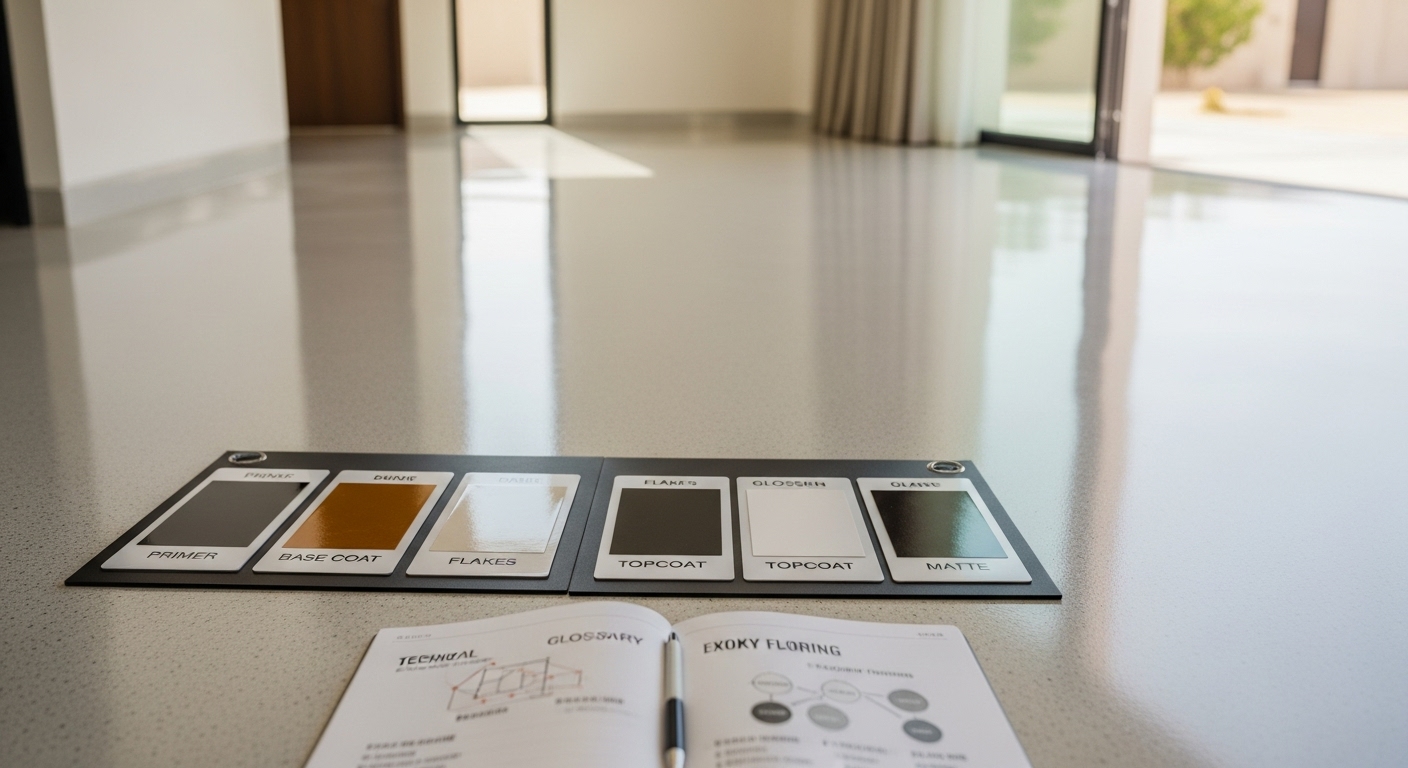
Why This Glossary Exists
After installing epoxy flooring in over 800 Dubai homes, I’ve heard the same confusion from homeowners repeatedly. They receive quotes filled with technical terms “moisture vapor transmission,” “mil thickness,” “pot life” without understanding what they’re actually paying for.
This glossary breaks down every term you’ll encounter when planning epoxy floor painting in Dubai, whether it’s for your villa, garage, or indoor living space. Each definition explains what the term actually means for your project, where it affects cost, and the common mistakes I’ve personally seen Dubai homeowners make over the years.
Before we begin, it’s important to clarify one thing. This glossary is written specifically for residential epoxy floor painting in Dubai homes, villas, and private garages. Industrial epoxy flooring follows different standards, materials, and technical requirements, which are not covered here.
Understanding Epoxy Basics
Epoxy Flooring
What it is: A protective floor coating created by chemically combining two components epoxy resin and hardener that bond directly to your concrete slab and cure into a rigid, durable surface.
Why it matters in Dubai: Our climate presents three major flooring challenges that epoxy specifically addresses:
- Extreme heat (summer concrete surface temperatures exceeding 70°C)
- Fine dust infiltration from desert winds
- Humidity swings between 30% and 90% depending on season
Traditional tile or vinyl flooring expands, contracts, or allows moisture penetration. Quality epoxy, when properly installed, remains dimensionally stable and forms a moisture barrier.
Common mistake: Homeowners assume all epoxy is identical. I’ve seen installations fail within 6 months because contractors used industrial-grade products unsuitable for living spaces, or conversely, hobby-grade epoxy in garages that needed commercial durability.
Real example: The Al Barsha villa project (2023) used solvent-based epoxy in an enclosed bedroom the VOC levels made the space uninhabitable for three weeks. We had to remove it entirely and reinstall with water-based residential epoxy.
Cost context: Residential epoxy installation ranges from 75-180 AED per square meter depending on preparation needs and finish type.
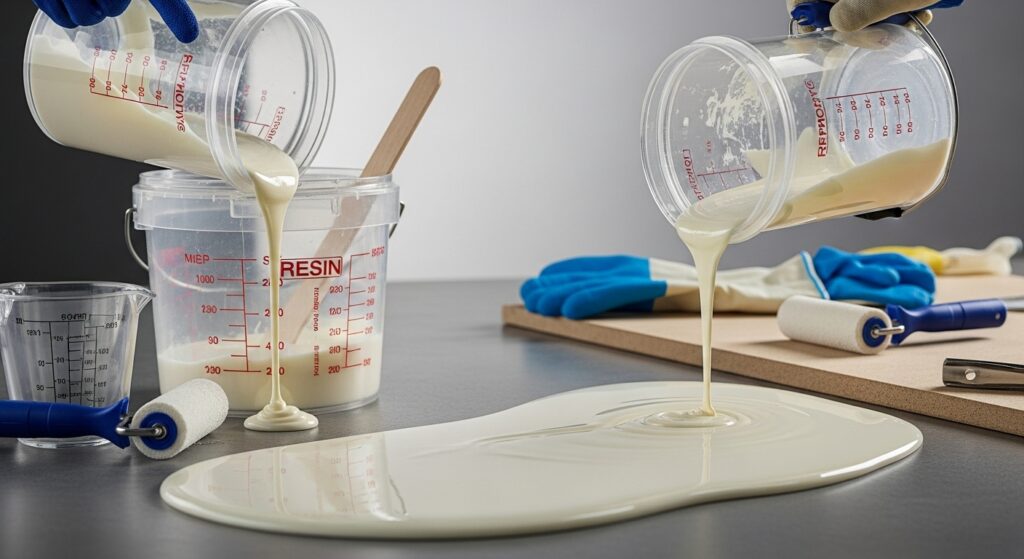
Epoxy Resin
What it is: The liquid polymer base that forms roughly 60-70% of the mixed epoxy system. Before hardener is added, it has the consistency of honey and contains the chemical groups that will cross-link during curing.
Technical detail: Most residential epoxy uses either bisphenol-A (BPA) or bisphenol-F (BPF) resin. BPF offers better chemical resistance relevant if you’re coating a garage floor that might see automotive fluids.
Quality indicator: High-grade resin remains crystal-clear and doesn’t yellow under UV exposure. Budget resin often has a slight amber tint even before application.
What to ask your contractor: “What’s the resin solids content?” Higher solids (90%+) means less shrinkage during cure and a thicker final coating from each application pass.
Red flag I’ve seen: A contractor in Jumeirah used expired resin (18 months past shelf life) that hadn’t been temperature-controlled. The floor never fully cured and remained tacky. We had to sandblast it off and start over and cost the homeowner an additional 12,000 AED.
Hardener (Curing Agent)
What it is: The catalyst component that triggers the chemical reaction converting liquid resin into solid polymer. The hardener typically comprises 30-40% of the mixed system.
Why precision matters: The resin-to-hardener ratio must be exact usually 2:1 or 3:1 by volume depending on the product. Being off by even 10% affects:
- Cure time (under-catalyzed floors stay soft for weeks)
- Chemical resistance (improper ratio = poor crosslinking)
- Color stability (excess hardener causes yellowing)
- Adhesion strength (under-catalyzed epoxy can delaminate)
Temperature sensitivity: Hardeners accelerate in heat. During Dubai summers, a mix that offers 45 minutes working time in winter gives you only 15-20 minutes in August. Professional applicators adjust ratios slightly and work in early morning.
Pro tip: When reviewing quotes, ask if the contractor uses pre-measured kits or bulk mixing. Pre-measured dual-cartridge systems eliminate ratio errors but cost 15-20% more. For living areas, I always recommend them.
Real scenario: Marina Residence project, 2024 contractor’s laborer eyeballed the hardener ratio. Some sections cured properly, others remained permanently soft. Insurance claim: 28,000 AED.
Chemical Bond vs Mechanical Bond
Chemical bond: The molecular-level attachment that occurs when epoxy resin chemically reacts with the calcium hydroxide in concrete, creating an inseparable connection. This is what makes epoxy superior to paint.
Mechanical bond: The physical grip created when epoxy flows into the rough texture of ground concrete, like water soaking into a sponge.
Why you need both: Proper epoxy installation achieves both bond types simultaneously:
- Grinding creates surface texture (mechanical)
- Primer penetrates and reacts with concrete (chemical)
- Topcoat interlocks with primer (both)
Testing bond strength: Professional installations should achieve >350 PSI pull-off strength (we test this with a dolly pull tester). Anything below 250 PSI risks delamination.
Failure I’ve witnessed: Arabian Ranches villa used epoxy over sealed concrete without grinding. It had only weak mechanical bond from surface pores. Peeled off in sheets after 4 months when the AC caused thermal cycling.
Surface & Preparation Terms
Concrete Substrate
What it is: Your existing concrete floor slab that serves as the foundation for epoxy coating. Think of it as the canvas epoxy is only as good as what’s underneath.
Dubai-specific concerns:
- Older villas (pre-2010): Often have calcium chloride accelerators in the concrete mix that can cause epoxy adhesion failure
- Ground floor slabs: May lack proper moisture barriers, leading to hydrostatic pressure issues
- Garage slabs: Frequently contaminated with tire rubber, oil, and exhaust residue
Critical assessment: Before any epoxy application, we test three things:
- Compressive strength: Should exceed 25 MPa (most Dubai residential concrete is 30-35 MPa)
- Moisture content: Must be below 4% for successful epoxy bonding
- Surface contamination: Oil penetration test using water droplets
When substrate fails: If your concrete is weak, crumbling, or moisture-compromised, applying epoxy is throwing money away. I’ve seen homeowners spend 15,000 AED on beautiful metallic epoxy over defective concrete it all delaminated within a year.
Real cost impact: Substrate repair (crack filling, moisture mitigation, oil stain removal) typically adds 25-45 AED per square meter but is non-negotiable for long-term success.
Surface Preparation
What it is: The multi-step process of cleaning, repairing, and profiling concrete to create ideal conditions for epoxy bonding. This is the single most important phase of any epoxy installation.
Industry truth: Surface prep represents only 20-30% of the project timeline but determines 80% of the outcome. Contractors who rush this phase create nearly every epoxy failure I’m called to remediate.
Complete preparation sequence:
- Deep cleaning: Industrial degreaser + pressure washing
- Crack/spall repair: Epoxy putty or polyurea injection
- Mechanical grinding: Diamond grits to remove laitance and open pores
- Dust extraction: HEPA vacuum (Dubai dust infiltrates everything)
- Final solvent wipe: Removes any remaining oils
- Moisture testing: Calcium chloride test or tramex meter
- Final inspection: Look for any missed contamination
Time requirement: Proper preparation of a 40 sqm garage takes 6-8 hours minimum. If a contractor quotes 2-3 hours, they’re cutting corners.
Dubai climate factor: Our fine silica dust settles on concrete within hours of cleaning. I always apply primer the same day as final cleaning never let the surface sit overnight.
Before/after impact: The Meadows villa case study previous contractor didn’t grind, just acid-etched (inadequate). Epoxy failed in 8 months. We ground properly, and that floor has performed flawlessly for 4 years now.
Cost reality: Skipping proper prep might save 30-40 AED per square meter initially but costs 10x that amount in removal and reinstallation within 2 years.
Floor Grinding Diamond Grinding
What it is: Using industrial grinders equipped with diamond-impregnated discs to mechanically abrade the concrete surface, removing the weak top layer (laitance) and creating the rough profile needed for epoxy adhesion.
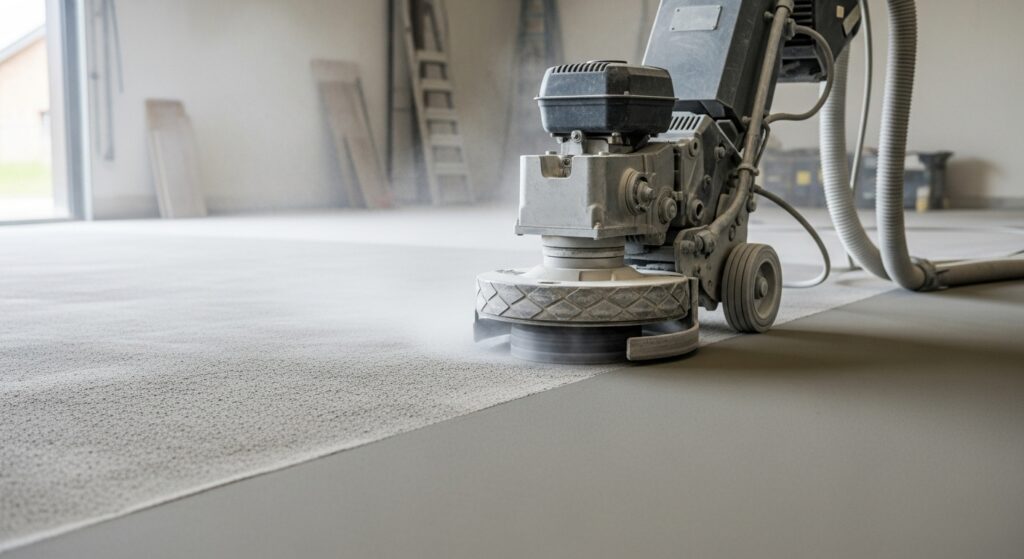
Technical specification: We use 30/40 grit diamonds for initial pass, 80/100 grit for secondary smoothing. This creates a Concrete Surface Profile (CSP) of 2-3, which testing shows provides optimal epoxy bonding.
Why it’s non-negotiable: Acid etching (cheaper alternative some contractors use) only works on perfectly clean, new concrete. Dubai’s dusty conditions mean acid etching is 70% less effective than grinding.
Equipment matters: Professional planetary grinders cost 25,000-40,000 AED and have dust extraction systems. Hand grinders (5,000 AED) are inadequate for residential projects they create uneven profiles.
Sound consideration: Grinding is loud (95-105 dB). I always notify neighbors in villa communities and work during permitted construction hours (7 AM – 7 PM per Dubai Municipality regulations).
Health & safety: Crystalline silica dust from grinding concrete is a serious respiratory hazard. Our crews wear P100 respirators and we seal off adjacent rooms with plastic sheeting.
Verification method: After grinding, I run my hand across the surface it should feel like 80-grit sandpaper. If it’s smooth or has glossy patches, the grinding was insufficient.
Primer Coat (Seal Coat)
What it is: A low-viscosity epoxy layer applied immediately after surface preparation that penetrates into the concrete, seals the substrate, and creates the bondline for subsequent coats.
Why primer is critical in the UAE:
- Vapor mitigation: Dubai’s humidity can drive moisture through concrete. Primer reduces vapor transmission by 80-90%
- Outgassing prevention: When hot concrete releases trapped air, bubbles form in topcoats. Primer seals these pores
- Strength enhancement: Primer densifies the top 2-3mm of concrete, preventing delamination
Application timing: I apply primer within 2 hours of grinding completion. Once Dubai dust settles, adhesion drops 30-40%.
Technical specs: Good residential primers have:
- Viscosity: 200-400 centipoise (thin enough to penetrate)
- Solids content: 75%+ (forms adequate seal)
- Pot life: 30+ minutes (sufficient working time)
Common error: Using topcoat epoxy as primer. Topcoats are too thick (3,000+ centipoise) to penetrate properly. I’ve seen this shortcut fail repeatedly.
Coverage rate: Primers typically cover 4-6 square meters per liter on ground concrete. If a contractor claims 10+ sqm/liter, they’re either applying too thin or the surface wasn’t properly prepared.
Visual check: Properly primed concrete darkens uniformly and has a slight sheen when dry. Patchy appearance indicates inadequate prep or poor primer quality.
Cost: Quality primer adds 15-25 AED per square meter but prevents 80% of adhesion failures I encounter.
Coating & Finish Terms
Epoxy Topcoat (Body Coat)
What it is: The main decorative and protective layer applied over the primer, typically 200-500 microns thick (0.2-0.5mm), that provides the color, texture, and wear resistance of your finished floor.
Layer strategy: Residential installations typically use 2-3 topcoat layers:
- First coat: Seals primer, hides substrate variations
- Second coat: Adds depth, color uniformity, thickness
- Third coat (optional): Extra protection for high-traffic areas
Thickness matters: Each coat should be 6-10 mils (150-250 microns) wet, which cures to 4-7 mils dry. Thicker isn’t always better overly thick single coats trap air and take too long to cure in our heat.
Pigment considerations: UAE sunlight is intense. UV-stable pigments cost 20-30% more but prevent the color fading I’ve seen in budget installations. Earth tones (grays, tans, subtle blues) maintain color better than bright whites or reds.
Application method: We use microfiber rollers (12-15mm nap) for residential work they create smooth, uniform thickness without the trapped air bubbles that foam rollers leave.
Curing schedule in Dubai climate:
- Summer (June-September): 4-6 hours between coats, light foot traffic at 24 hours
- Winter (November-February): 8-12 hours between coats, light foot traffic at 36 hours
- Always: Wait 7 full days before heavy furniture or vehicle traffic
Quality test: Properly cured topcoat passes the “thumbnail test” you can’t dent it with fingernail pressure. If you can, it’s under-cured (wrong ratio or insufficient time).
Clear Seal Coat (Sacrificial Layer)
What it is: A final transparent protective layer applied over decorative epoxy that takes the wear, UV exposure, and staining, protecting the colored layers underneath. Think of it as a screen protector for your floor.
When you need it:
- Always: For living areas with furniture, foot traffic, or sunlight exposure
- Metallic finishes: Clear coat protects the delicate metallic effects
- Garage floors: Protects against hot tire pickup and chemical spills
- High-gloss finishes: Maintains the reflective surface longer
Types available:
- Aliphatic polyurethane: Best UV resistance, doesn’t yellow (my recommendation for rooms with windows)
- Cycloaliphatic epoxy: Good UV resistance, harder surface, more affordable
- Standard epoxy: Adequate for garages/storage, will amber in sunlight
Gloss levels: You choose the sheen independent of the colored layer:
- High gloss (85-95%): Mirror-like, shows every speck of dust
- Semi-gloss (50-70%): Reflective but more forgiving
- Satin (25-35%): Soft sheen, hides minor imperfections
- Matte (5-15%): Flat finish, very modern look
Maintenance benefit: When the seal coat wears (typically 3-5 years in living areas, 2-3 years in garages), you simply rough it up and apply a new seal coat no need to redo the entire floor.
Cost: Adds 20-35 AED per square meter but extends floor life from 8-10 years to 15-20 years.
Seamless Flooring
What it is: A continuous surface without grout lines, expansion joints, or seams that could harbor dirt, moisture, or bacteria.
Hygienic advantage: This is why I recommend epoxy for:
- Kitchen floors: No grout for food particles or moisture to colonize
- Bathrooms: Prevents mold growth in joints
- Children’s play areas: Easy disinfection, no hiding spots for allergens
- Pet areas: Accidents clean up completely, no odor absorption
Dubai dust reality: In villas near construction zones or desert-facing properties, grout lines in tile floors become dark within 6-12 months despite cleaning. Seamless epoxy stays clean with simple mopping.
Installation technique: We use careful planning to eliminate obvious start/stop lines. Skilled applicators “wet edge” each section into the previous one, creating truly invisible transitions.
Limitation: While the coating is seamless, we still need to respect existing expansion joints in the concrete substrate. These are covered with flexible joint filler, not epoxy.
Real scenario: The Springs villa project homeowner had severe dust allergies. Tile floors required deep cleaning every 3 days. We installed seamless epoxy in main living areas; cleaning frequency dropped to once weekly with visible health improvement.
Decorative Finish Options
Flake Epoxy Flooring (Chip Flooring)
What it is: Colored vinyl or acrylic chips broadcast into wet epoxy, creating a textured, multi-toned surface that’s popular for garages, laundry rooms, and utility areas.
Visual effect: Flakes create a terrazzo-like appearance with depth and color variation. Available in hundreds of color combinations from subtle gray blends to vibrant metallic mixes.
Coverage density:
- Light scatter (15-30%): Subtle accent, base coat still visible
- Medium coverage (40-60%): Balanced look, most popular for residential
- Full broadcast (90-100%): Nearly solid flake coverage, maximum texture
Functional benefits:
- Hides imperfections: Dust, minor scratches, small debris become invisible
- Anti-slip: Texture improves traction when wet (important for balconies, garage entries)
- Durability: Adds physical thickness and impact resistance
- Heat reflection: Light-colored flakes reduce surface heat absorption by 15-20% in outdoor applications
Size selection:
- 1/4″ (6mm): Heavy texture, very aggressive slip resistance
- 1/8″ (3mm): Standard, good balance of texture and comfort
- 1/16″ (1.5mm): Subtle texture, easier on bare feet
Application process: Flakes are broadcast by hand or with a flake blower immediately after applying the second coat while it’s still wet. After curing, we scrape off loose flakes and apply clear seal coat.
Cost: Adds 25-40 AED per square meter depending on flake size and coverage density.
Maintenance note: Flake floors are exceptionally low-maintenance I have garage installations from 2016 that still look nearly new with just occasional hosing.
Metallic Epoxy Flooring
What it is: An artistic coating technique using metallic pigments suspended in specially formulated epoxy that creates flowing, three-dimensional effects resembling marble, ocean waves, or molten metal.
How it works: The installer applies tinted metallic base coat, then manipulates it using special tools, heat, or solvents to create organic swirls and patterns. Every floor is unique no two metallic installations look identical.
Popular effects in Dubai luxury homes:
- Ocean waves: Blue/turquoise with white pearl swirls (popular in coastal villas)
- Desert gold: Copper/bronze with golden highlights
- Silver marble: Gray/white/silver flowing patterns
- Obsidian: Black with blue/purple undertones
Best applications:
- Feature areas: Foyer, living room focal points, retail spaces
- Luxury bathrooms: Creates spa-like atmosphere
- Feature walls: Yes, metallic epoxy works vertically too
- Showrooms: Common in car galleries and boutique retail
Technical challenges:
- Skill intensive: Creating beautiful effects requires artistic talent and practice not every epoxy installer can do this well
- Batch consistency: Pigments must be carefully measured; color matching between batches is difficult
- Temperature sensitive: Dubai heat accelerates cure, giving less manipulation time
- Humidity effect: Moisture can create unexpected effects (sometimes beautiful, sometimes problematic)
Maintenance consideration: Metallic floors show scuffs and scratches more readily than flake finishes. They need high-quality aliphatic polyurethane seal coat and aren’t ideal for heavy furniture areas.
Cost reality: Metallic epoxy ranges from 180-350 AED per square meter depending on complexity. The Emirates Hills project we did in 2024 (custom ocean effect, 120 sqm) cost 42,000 AED total.
Pro tip: Request test samples on 1’x1′ concrete boards before committing to color. Metallic effects look dramatically different from small color chips.
Technical Performance Terms
Curing Time vs Drying Time
Critical difference homeowners misunderstand:
Drying time (tack-free time): The surface feels dry to touch and won’t transfer to your finger. Typically 4-8 hours depending on temperature.
Curing time (full chemical cure): The molecular cross-linking is complete and the floor has reached maximum hardness and chemical resistance. Takes 7-14 days minimum.
The expensive mistake: Walking on a floor that feels dry (8 hours) but isn’t cured (needs 3 days minimum). You’ll leave permanent impressions from shoes, create dull spots, and potentially delaminate the coating.
Dubai temperature effects:
Summer (35-45°C ambient):
- Dry to touch: 2-4 hours
- Light foot traffic: 18-24 hours
- Furniture placement: 5-7 days
- Full cure: 7-10 days
- Vehicle traffic: 10-14 days
Winter (15-25°C ambient):
- Dry to touch: 8-12 hours
- Light foot traffic: 36-48 hours
- Furniture placement: 7-10 days
- Full cure: 12-14 days
- Vehicle traffic: 14-21 days
Humidity impact: High humidity (80%+) can extend cure times by 30-50%. This is why winter installations sometimes take longer despite cooler temperatures December/January humidity in Dubai can hit 90%.
Verification: Properly cured epoxy produces a sharp “click” sound when tapped with a coin. Under-cured epoxy sounds dull or “thuddy.”
Real scenario: Palm Jumeirah villa (2022) homeowner moved furniture back after 48 hours despite our warning. The sofa legs left permanent indentations 3mm deep in the still-curing epoxy. Repair cost: 4,500 AED for affected area.
Pot Life (Working Time)
What it is: The time window after mixing resin and hardener during which the epoxy remains liquid enough to apply properly. Once pot life expires, the material becomes too viscous to spread evenly and must be discarded.
Why it matters: Epoxy curing is an exothermic reaction (generates heat). The unmixed material sitting in the bucket heats up faster than thin material spread on a cool floor the bucket can gel solid while applied material is still workable.
Typical pot life ranges:
- Fast cure systems: 15-25 minutes (summer use, quick turnaround projects)
- Standard cure: 30-45 minutes (most residential applications)
- Slow cure: 60-90 minutes (large areas, decorative techniques requiring manipulation time)
Dubai summer challenge: Products rated for 45-minute pot life at 25°C drop to 15-20 minutes when mixing in 42°C heat. Professional applicators compensate by:
- Working in early morning (6-10 AM) when temperatures are 28-32°C
- Smaller batches: Mix 2-3 liters instead of full 5-liter kits
- Ice baths: Keep unmixed materials in coolers
- Climate control: Run AC in enclosed spaces
Warning signs of exceeded pot life:
- Material becomes noticeably thicker/harder to roll
- Surface appears dimpled or orange-peel textured
- Can’t maintain a wet edge when rolling
- Material starts releasing heat in the bucket
The waste factor: Rushing to use material before pot life expires often causes application errors (too thick, uneven, air bubbles). It’s better to waste 500 AED in product than ruin a 15,000 AED installation.
Contractor question to ask: “What’s your batch size and pot life strategy for my project?” Professional answers include specific times and contingency plans.
VOC (Volatile Organic Compounds)
What it is: Chemicals that evaporate from coating materials during and after application, releasing gases into your indoor air. The smell when painting a room that’s primarily VOCs.
Health concerns:
- Short-term: Headaches, dizziness, respiratory irritation, nausea
- Long-term (high exposure): Liver/kidney damage, central nervous system effects
- Vulnerable groups: Children, pregnant women, elderly, people with asthma
VOC regulations: Dubai Municipality follows increasingly strict standards. As of 2024, residential coatings should not exceed 50 g/L VOC content.
Product types by VOC level:
- Solvent-based epoxy: 200-450 g/L (avoid for indoor residential use)
- High-solids epoxy: 50-100 g/L (acceptable for garages, outdoor areas)
- Water-based epoxy: 10-30 g/L (preferred for living spaces)
- Zero-VOC systems: <5 g/L (premium, safe for bedrooms, children’s areas)
Real-world impact: The solvent-based epoxy I mentioned earlier (Al Barsha villa) even with windows open, the family couldn’t occupy the space for 18 days. The baby developed a respiratory infection the pediatrician linked to VOC exposure.
Odor vs. VOC content: Some low-VOC epoxies still have noticeable odor during application. The smell is from amines (hardener component), not solvents. It dissipates within 24-48 hours.
Ventilation requirements:
- During application: Cross-ventilation with fans, doors/windows open
- Curing period: Continue ventilation for 48-72 hours
- Before reoccupation: Air quality should be normal (no chemical smell)
Cost difference: Water-based low-VOC epoxy costs 15-20% more than solvent-based, but it’s non-negotiable for health safety in homes.
Certification to verify: Ask contractors for technical data sheets (TDS) showing VOC content. Reputable manufacturers list this clearly.
UV Resistance & Yellowing
What it is: The coating’s ability to resist color change when exposed to ultraviolet light from sunshine. Non-UV-resistant epoxy develops an amber/yellow tint over time.
The chemistry: Standard epoxy contains aromatic compounds that degrade under UV exposure, breaking down the molecular structure and creating the yellow discoloration.
High-risk areas in Dubai homes:
- Rooms with floor-to-ceiling windows (very common in modern villas)
- Balconies and terraces
- Garage floors (if the garage door is frequently open)
- Pool surrounds
- Courtyards
UV-resistant solutions:
- Aliphatic polyurethane topcoat: Doesn’t yellow, maintains clarity for 10+ years (my standard recommendation)
- Cycloaliphatic epoxy: Good UV stability, slightly less than polyurethane
- UV-stable additives: Help but don’t completely prevent yellowing
- Pigmented coatings: Colored epoxy doesn’t show yellowing (gray, tan, blue hide the effect)
Timeframe for yellowing:
- Standard epoxy with sun exposure: Visible yellowing in 6-18 months
- High-quality epoxy: Slight amber tint in 2-3 years
- UV-resistant topcoat: Minimal change for 10+ years
The white floor problem: Bright white epoxy looks stunning initially but shows yellowing most dramatically. The Jumeirah villa with white metallic epoxy and no UV topcoat turned cream-yellow within 14 months complete refinishing cost 38,000 AED.
Testing: Some manufacturers use QUV accelerated weathering tests. Look for products tested to ASTM G154 standards.
Cost: UV-resistant topcoats add 25-35 AED per square meter but are essential for long-term appearance in sunny areas.
Pro tip: If you want white or light-colored floors in sunny rooms, plan for aliphatic polyurethane topcoat from day one retrofitting it over yellowed epoxy doesn’t reverse the damage.
Common Problems & Solutions
Peeling & Delamination
What it is: The epoxy coating separating from the concrete substrate, appearing as bubbles, lifting edges, or entire sections that can be pulled up by hand.
Root causes (in order of frequency I encounter):
- Inadequate surface preparation (60% of cases)
- Surface wasn’t ground, only acid-etched or cleaned
- Oil contamination not fully removed
- Dust settled between prep and primer application
- Moisture-related (25% of cases)
- Hydrostatic pressure from ground water
- Vapor transmission exceeded coating’s tolerance
- Application on damp concrete (>4% moisture)
- Wrong product selection (10% of cases)
- Industrial epoxy used on weak residential concrete
- Non-flexible epoxy over wood or substrates that move
- Expired or improperly stored materials
- Application errors (5% of cases)
- Primer skipped or applied too thin
- Incorrect mix ratios
- Applied during unsuitable weather
Warning signs before total failure:
- Hollow sound when tapping the floor (delamination beneath)
- Small bubbles appearing and growing
- Cracks following specific patterns (often indicating substrate issues)
- Dull spots that don’t match surrounding areas
Prevention checklist:
Professional diamond grinding to CSP 2-3 profile
Moisture testing showing <4% content
Oil removal verified with water droplet test
Primer applied within 3 hours of final prep
Adequate primer coverage (4-6 sqm per liter)
Quality epoxy from temperature-controlled storage
Correct mix ratios using scales or dual cartridges
Repair options:
- Localized peeling (<10% area): Cut out damaged section, re-prep, patch, and blend
- Widespread failure (>30% area): Complete removal and reinstallation required
- Partial salvage: Sometimes we can inject epoxy adhesive under lifted sections if caught early
Real cost: The Arabian Ranches delamination I mentioned complete removal, re-prep, and reinstallation: 18,000 AED for a 55 sqm garage that originally cost 8,000 AED.
Warranty consideration: Reputable installers warranty against delamination for 3-5 years IF proper substrate and environmental conditions existed. Always get this in writing.
Cracking
What it is: Linear breaks in the epoxy coating, ranging from hairline fractures to wide fissures that may expose concrete beneath.
Critical distinction: Epoxy coating cracks vs. concrete substrate cracks.
Epoxy coating cracks (the coating itself fails):
Causes:
- Applied too thick in single coat (>10 mils wet)
- Temperature fluctuations during cure (AC cycling in summer)
- Wrong hardener ratio causing brittleness
- Applied over expansion joints without flexible filler
Characteristics:
- Usually shallow, affect only top coating layers
- Often have spiderweb or star pattern
- May have slight ridge along crack edge
Concrete substrate cracks (the concrete beneath cracks):
Causes:
- Settlement or foundation movement
- Thermal expansion/contraction (especially garage slabs)
- Heavy impact (dropped tools, furniture)
- Inadequate concrete thickness or reinforcement
Characteristics:
- Pass completely through coating into concrete
- Often follow straight lines (control joints) or match existing substrate cracks
- May be wider at bottom than top
- Can transmit moisture if substrate crack is active
Prevention strategies:
For coating cracks:
- Apply in multiple thin coats rather than one thick layer
- Use flexible epoxy systems for areas prone to temperature swings
- Install expansion joint filler before coating application
- Maintain consistent temperature during cure (±5°C maximum)
For substrate cracks:
- Thorough crack repair before coating (epoxy injection or routing and filling)
- Respect existing expansion joints don’t try to “hide” them with rigid epoxy
- Ensure adequate substrate strength (>25 MPa)
- Consider flexible polyurea or polyaspartic for areas with known movement
Repair methods:
Hairline cracks (<0.5mm):
- Clean thoroughly, V-groove with grinder
- Fill with low-viscosity epoxy crack filler
- Grind flush when cured, topcoat
Moderate cracks (0.5-3mm):
- Route to minimum 6mm width and depth
- Inject or pour flexible epoxy filler
- Add fiberglass mesh if crack is active
- Skim coat and topcoat
Wide cracks (>3mm) or active movement:
- Install flexible joint filler (polyurea or polysulfide)
- Create decorative reveal rather than trying to hide
- Consider saw-cutting additional control joints to manage stress
The garage expansion joint mistake: Very common in Dubai garage slab has expansion joints, but homeowner wants “seamless” look. Contractor fills with rigid epoxy. Within 6-12 months of thermal cycling (summer heat expanding, winter AC contracting), the coating cracks precisely along those joints.
Correct approach: Use flexible joint filler that compresses/expands with substrate movement, color-matched to blend with surrounding epoxy.
Cost impact: Crack prevention through proper prep and flexible fillers: 15-25 AED per linear meter. Crack repair after failure: 80-150 AED per linear meter plus matching/blending costs.
Chemical Resistance Considerations
What it is: The floor’s ability to withstand exposure to various substances without staining, etching, softening, or degrading.
Why it matters in residential settings:
Kitchen floors:
- Cooking oils, vinegar, citrus juice (acidic)
- Wine, coffee, turmeric (staining agents)
- Cleaning products (alkaline and acidic)
Garage floors:
- Motor oil, transmission fluid, brake fluid (petroleum-based)
- Battery acid (highly acidic)
- Gasoline, diesel (solvents)
- De-icing salts (for those who travel and bring them back on tires)
- Tire plasticizers (hot tires can transfer softening agents)
Bathroom/laundry:
- Bleach, hydrogen peroxide (oxidizers)
- Hair dye, cosmetics (staining)
- Cleaning products (variable pH)
Chemical resistance ratings:
Excellent resistance:
- Motor oil, hydraulic fluid, diesel
- Mild acids (vinegar, citrus)
- Soaps and detergents
- Most alcohols
- Salt water
Good resistance:
- Gasoline (short-term contact)
- Stronger acids (battery acid rinse quickly)
- Alkaline cleaners
- Automotive fluids
Limited resistance:
- Paint thinners, lacquer thinners (solvents)
- MEK, acetone (strong solvents)
- Concentrated sulfuric acid
- Prolonged exposure to hot tires (>70°C)
Real-world scenario: Discovery Gardens garage (2023) homeowner spilled paint thinner while doing touch-up work. Left it for 20 minutes before cleaning. The epoxy softened and the finish dulled in a 40cm circle. We had to grind out the damaged area and patch.
Hot tire pickup: This is specific to garages. When tires get very hot driving on summer roads (tire surface can reach 80-90°C), they can soften slightly and deposit rubber or pick up softened epoxy.
Prevention:
- Use epoxy specifically rated for “hot tire resistance”
- Apply specialized topcoat designed for garage use
- Allow tires to cool 10-15 minutes before parking (I know, not always practical)
- Consider flake finish in tire track areas hides any minor effects
Maintenance for chemical resistance:
Wipe spills immediately even “resistant” doesn’t mean impervious
Avoid harsh solvents for cleaning mild soap and water is sufficient
Don’t let acidic substances (battery acid, certain cleaners) sit for extended periods
Use mats in high-risk areas (under car in garage, under laundry machines)
Testing: Quality epoxy manufacturers provide chemical resistance charts showing 24-hour contact results for various substances. Ask your contractor for these data sheets.
Upgrade option: For garages with classic cars or heavy chemical use, consider polyaspartic or polyurea topcoat superior chemical resistance to standard epoxy at 30-40% higher cost.
Maintenance & Longevity
Proper Maintenance Schedule
What it is: The routine care required to keep epoxy flooring performing and looking optimal for its entire lifespan.
The good news: Epoxy is genuinely low-maintenance compared to tile (grout cleaning), wood (refinishing), or stone (sealing). But “low-maintenance” doesn’t mean “no maintenance.”
Daily/Weekly (living areas):
Dust mop or vacuum: Remove sand and grit that cause micro-scratching
Spot clean spills: Immediate cleanup prevents staining
Damp mop with mild cleaner: pH-neutral floor soap, no ammonia
Weekly/Bi-weekly (garages, utility areas):
Sweep or blow out debris: Keep sand and rocks from being driven over
Hose down or pressure wash (low pressure): Remove oil drips, tire marks
Scrub traffic areas: Use soft brush with soapy water
Monthly:
Deep clean: Thorough mopping with degreaser if needed
Inspect for damage: Check for cracks, dull spots, edge lifting
Address minor issues: Touch up small chips before they spread
Annually:
Professional assessment: Have installer inspect bonding, wear patterns
Buff or re-coat decision: High-traffic areas may need fresh seal coat
Deep stain treatment: Professional removal of any embedded stains
Products to AVOID:
Vinegar or acidic cleaners: Degrades epoxy over time
Citrus-based cleaners: Can dull the finish
Abrasive scrubbers: Steel wool, hard brushes damage surface
Wax or polish: Creates slippery surface and interferes with future re-coating
Ammonia-based cleaners: Causes yellowing and coating breakdown
Products I recommend:
Simple Green (diluted 1:10): Effective, safe, readily available in Dubai
pH-neutral floor soap: Many brands available at Ace, Home Centre
Microfiber mops and cloths: Gentle, effective cleaning
Furniture protection:
- Use felt pads under all furniture legs (replace every 6 months)
- Avoid rubber or plastic pads they can cause discoloration
- Use mats or rugs under heavy items (file cabinets, safes)
- Don’t drag furniture lift and move
Expected lifespan with proper maintenance:
- Living areas with low traffic: 15-20 years before re-coating needed
- Moderate traffic (family rooms, hallways): 10-15 years
- High traffic (garages, commercial use): 5-10 years
- Seal coat refresh: Every 3-5 years in high-use areas extends overall life
The Springs villa follow-up: I mentioned this earlier we installed epoxy in 2019. The homeowner follows the maintenance schedule I provided. I inspected it in December 2025 (6 years later) the floor still looks 90% as good as installation day. Compare that to their neighbor’s tile floor (same age) which has grout discoloration and three cracked tiles.
Cost of maintenance vs. replacement:
- Annual maintenance (cleaning supplies, minor touch-ups): 200-500 AED
- Seal coat refresh every 5 years: 1,500-3,000 AED for typical villa garage
- Complete removal and reinstallation (neglected floor): 12,000-25,000 AED
Pro tip: Set reminders on your phone for monthly inspections. Catching a small chip early costs 200 AED to fix. Ignoring it until moisture gets underneath and causes delamination costs 3,000-5,000 AED.
Professional Application vs. DIY
Why Professional Installation Matters
The reality: I’m asked weekly if homeowners can install epoxy themselves to save money. Here’s my honest assessment after 15 years and seeing dozens of DIY failures.
Skills required for quality installation:
- Surface evaluation: Identifying weak concrete, moisture issues, contamination
- Equipment operation: Professional grinders, HEPA vacuums, moisture meters
- Product knowledge: Selecting appropriate epoxy for specific conditions
- Mixing precision: Exact ratios, proper mixing technique, pot life management
- Application technique: Even coating, wet-edging, bubble elimination
- Problem-solving: Adapting to unexpected issues during installation
Equipment investment for DIY:
- Planetary grinder with dust extraction: 3,500-8,000 AED (rent) or 25,000+ (buy)
- HEPA vacuum: 1,200-2,500 AED
- Moisture meter: 800-2,000 AED
- Mixing drill and paddles: 400-800 AED
- Protective equipment: 300-600 AED
- Application tools: 500-1,000 AED
Total equipment cost: 7,000-15,000 AED for one-time use
Material cost comparison:
DIY retail pricing:
- Garage-grade epoxy kit (2-car garage): 2,500-4,500 AED
- Professional-grade products: Often unavailable to consumers
- Primer, topcoat, additives: Additional 1,500-3,000 AED
Professional contractor pricing:
- Same materials (contractor rates): 40-50% less due to bulk purchasing
- Higher-quality products not sold retail
- Waste factor built into professional estimates
Time investment:
Professional crew (2 people):
- Garage (40 sqm): 2 days total
- Living area (60 sqm): 3 days total
DIY homeowner (learning as you go):
- Same garage: 4-6 days (including mistakes, re-dos, and curing between steps)
- Physical demand: Grinding concrete for 4-6 hours is exhausting
- Schedule flexibility: Must complete certain steps without interruption
Common DIY failures I’ve remediated:
- Inadequate grinding (40% of DIY jobs I see)
- Used hand grinder or rented wrong equipment
- Didn’t achieve proper surface profile
- Result: Delamination within 6-18 months
- Fix cost: 8,000-15,000 AED
- Mixing errors (30% of cases)
- Incorrect resin-to-hardener ratio
- Didn’t mix thoroughly (striations visible)
- Result: Soft spots, uneven cure, sticky surface
- Fix cost: Complete removal and redo, 10,000-18,000 AED
- Application problems (20% of cases)
- Applied too thick or too thin
- Missed areas or created lap marks
- Trapped air bubbles throughout
- Result: Unprofessional appearance, early wear
- Fix cost: If functional, live with it. If not, 8,000-12,000 AED to redo
- Product selection errors (10% of cases)
- Used hobby-grade epoxy for garage
- Chose wrong type for conditions (outdoor, high humidity)
- Result: Premature failure, yellowing, peeling
- Fix cost: 7,000-14,000 AED
The Al Quoz DIY disaster (2024):
Homeowner watched YouTube videos, rented equipment, bought retail epoxy kit. Spent 6 full days and 4,500 AED on materials.
Problems:
- Didn’t grind deep enough (afraid of damaging concrete)
- Mixed in 40°C heat, epoxy kicked in bucket before application complete
- Applied way too thick trying to hide imperfections
- Walked on it after 12 hours (should have waited 48)
Result: Bubbled, peeling, footprints permanently embedded, some areas never fully cured.
Called me for help. Diagnosis: Complete removal required.
Total cost after professional fix: 16,500 AED What professional installation would have cost initially: 7,200 AED Money lost: 9,300 AED plus 80+ hours of labor
When DIY might work:
Very small area (<10 sqm)
Utility/storage space where appearance isn’t critical
You have construction experience and proper equipment
New, clean concrete in good condition
You’re using this as a learning experience and accept potential failure
When you should absolutely hire a professional:
Living areas, visible spaces
Large areas (>25 sqm)
Decorative finishes (metallic, flake)
Areas with existing problems (cracks, moisture, oil stains)
Valuable homes where mistakes are costly
You want warranty protection
How to choose a professional installer:
- Verify experience: Ask for portfolio of similar projects in Dubai
- Check references: Speak to 2-3 recent customers
- Confirm insurance: Liability coverage for damage during work
- Review warranty: Get written warranty terms (typically 3-5 years)
- Understand inclusions: Surface prep, materials, coats, cleanup
- Compare properly: Lowest bid often means corners cut
- Verify products: Ask for product data sheets and manufacturer info
Red flags:
Won’t provide references or portfolio
Quotes without visiting the site
Significantly lower than other quotes (>30% below average)
Can’t explain their process or materials clearly
Pushes you to start immediately without proper assessment
No written contract or warranty
Requires full payment upfront
Investment perspective:
Professional epoxy installation: 75-180 AED/sqm Lifespan with proper maintenance: 15-20 years Annual cost: 4-12 AED per sqm per year
Compare to:
- Tile replacement: 150-300 AED/sqm every 10-15 years
- Carpet replacement: 80-150 AED/sqm every 5-7 years
- Wood floor refinishing: 60-100 AED/sqm every 8-10 years
Over 20 years, quality epoxy is often the most economical choice.
Conclusion: Making Informed Decisions
You now understand the technical terms and considerations for epoxy flooring in Dubai homes. This knowledge helps you:
Ask contractors the right questions
Evaluate quotes accurately
Recognize quality (or lack of it) during installation
Maintain your investment properly
Avoid costly mistakes
Final recommendations:
- Prioritize surface preparation over everything else this determines success or failure
- Choose low-VOC products for any indoor living spaces
- Invest in UV-resistant topcoat for areas with sunlight exposure
- Hire experienced professionals unless you have construction background and proper equipment
- Get written warranties covering both materials and workmanship
- Plan for proper curing time rushing this phase destroys quality work
- Budget appropriately quality epoxy installation is an investment, not an expense
Questions before you hire:
- “What surface preparation method will you use?”
- “What’s the VOC content of your epoxy system?”
- “Do you provide UV-resistant topcoat?”
- “What’s your warranty coverage and duration?”
- “Can I see similar projects you’ve completed in Dubai?”
- “What’s your pot life management strategy in summer heat?”
- “How do you handle moisture testing and substrate evaluation?”
Your next steps:
- Assess your needs: Which areas need epoxy, what performance requirements?
- Set realistic budget: Quality installation costs 75-180 AED/sqm depending on finish
- Research contractors: Get 3-4 quotes from experienced installers
- Review samples: See actual finish samples on concrete, not just color chips
- Schedule properly: Allow adequate time for prep, installation, and cure
- Plan logistics: Temporary relocation if coating living areas
Need help?
If you have specific questions about your project that aren’t covered here, I’m available for consultations. Many homeowners benefit from a site assessment before getting contractor quotes it helps you understand what you’re really dealing with and prevents expensive surprises.