A villa owner in Emirates Hills called me last month, frustrated and confused. She’d hired a painter three weeks earlier to repaint her entire villa. The job was “finished” in five days. Now, just four weeks later, paint was peeling in her master bathroom, cracks were reappearing in the living room, and the exterior walls showed uneven coverage.
He said it would last five years minimum,” she told me. “What went wrong?”
I inspected the work. The painter had skipped surface preparation entirely, used cheap interior paint in moisture-prone bathrooms, applied single coats where two were needed, and never sealed exterior cracks properly. He’d rushed through what should have been a three-week process in five days.
The fix cost her AED 38,000 more than double her original payment of AED 16,500.
Since 2014, I’ve painted 127 Dubai villas from compact townhouses in Springs to sprawling compounds in Palm Jumeirah. Through my villa painting services Dubai operations, I’ve seen the full spectrum: projects that still look perfect after eight years, and jobs that fail within eight months. I’ve also repaired 23 failed paint jobs where contractors cut corners. The difference always comes down to process.
This guide documents the exact 18-step process I follow on every villa painting project. Real timelines, actual costs, specific products, and honest limitations based on 127 completed villas.
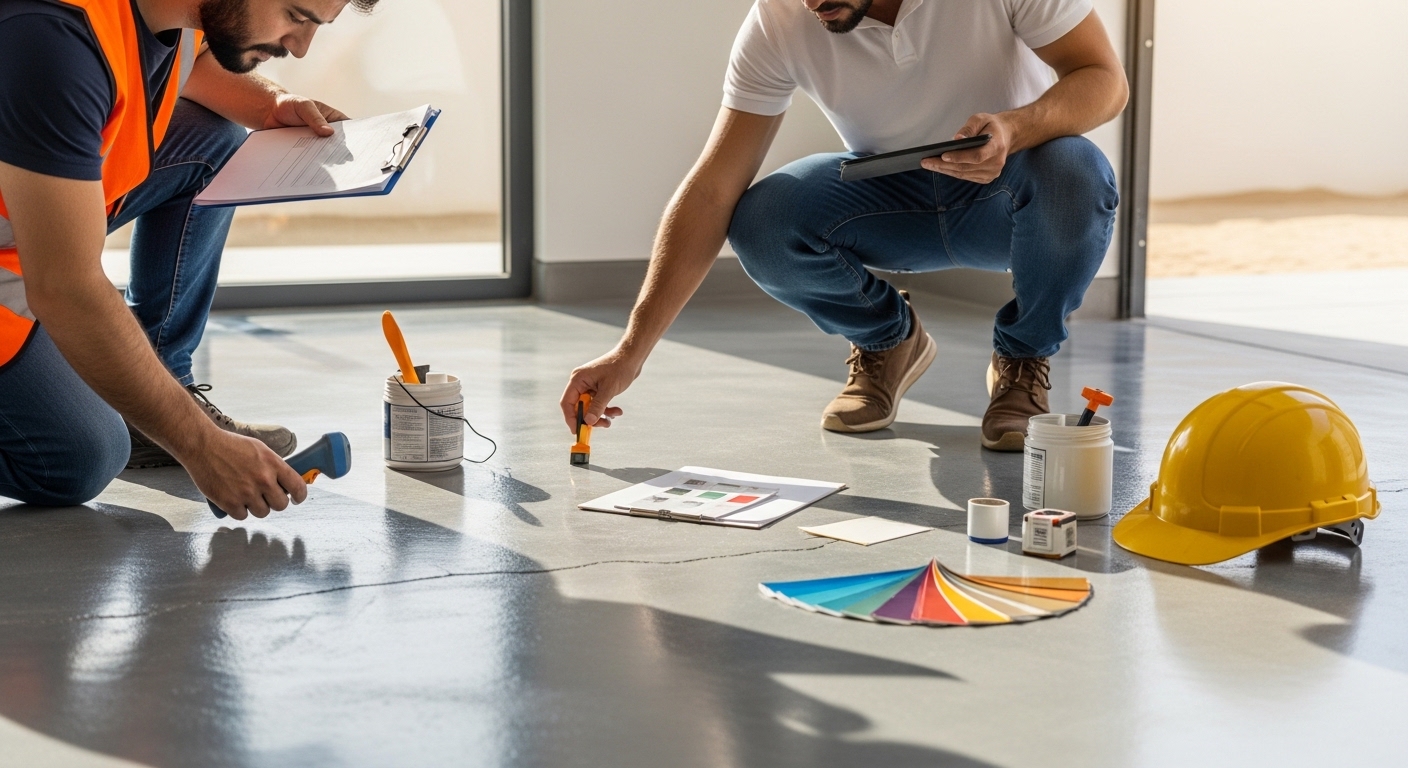
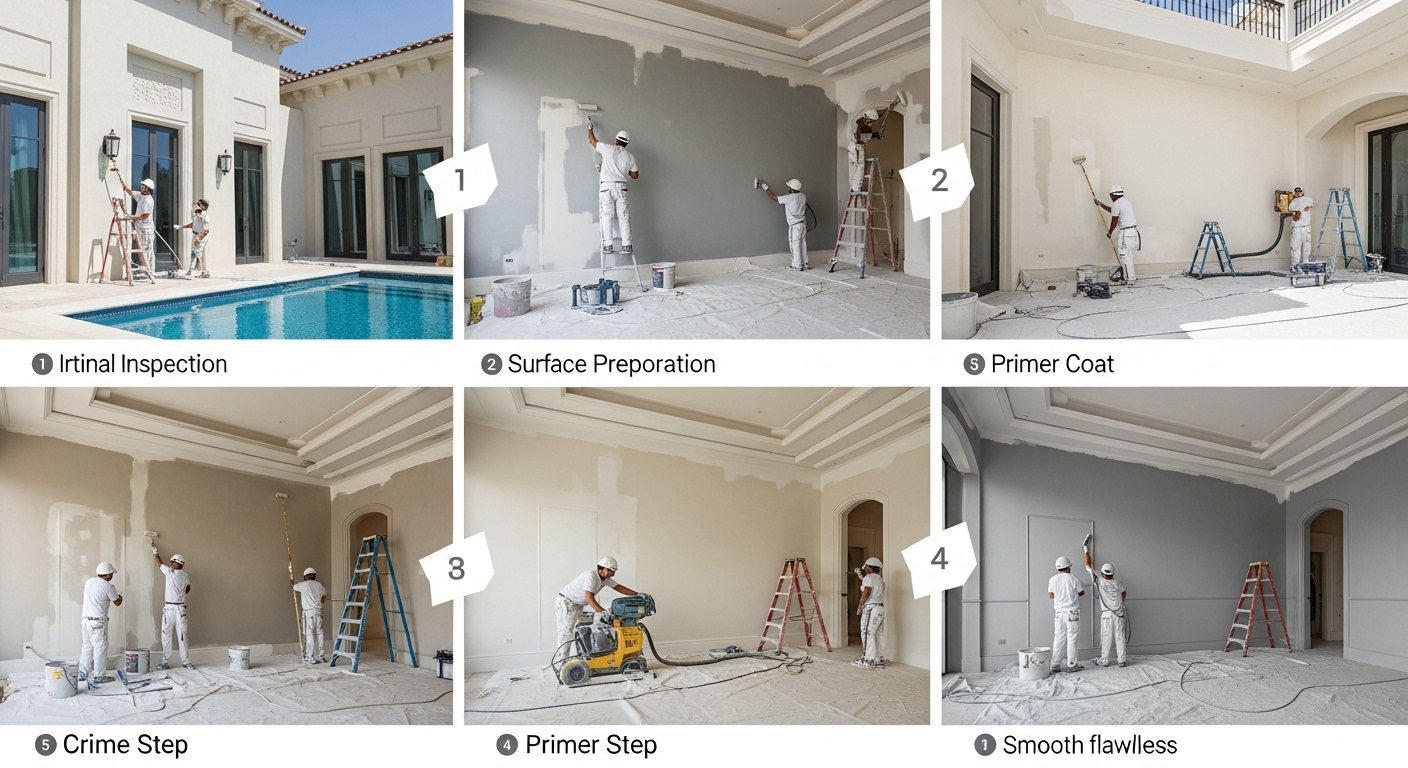
Step 1: Initial On-Site Inspection and Documentation (Day 0: 2-3 Hours)
Every villa project starts with a physical site visit. I never quote from photos or descriptions Dubai villas hide too many problems that only show up in person.
What I examine during inspection:
Exterior walls:
- Surface condition (chalking, peeling, bubbling)
- Crack patterns and severity
- Moisture damage indicators
- Previous paint layers and compatibility
- Sun exposure and fading patterns
Interior walls:
- Room-by-room condition assessment
- Crack mapping (I photograph and mark significant cracks)
- Water damage from AC leaks or plumbing
- Mold growth in bathrooms or poorly ventilated areas
- Previous paint quality and layers
Structural elements:
- Window frames and sealing
- Door frames condition
- Ceiling condition and water stains
- Expansion joints and movement cracks
- External factors (pools, gardens, irrigation proximity)
Documentation I create:
I use a tablet to document everything photographically. Every room gets 4-6 photos minimum. Problem areas get close-up shots with measurements. I create a digital folder for each villa that includes:
- 80-120 photos on average for standard villa
- Written notes on wall conditions
- Crack measurements and locations
- Moisture meter readings in suspect areas
- Previous paint type identification (solvent vs. water-based)
Case Example: Arabian Ranches Villa (November 2024)
During inspection, I found what homeowner thought was “just some cracks” in the external south-facing wall. Moisture meter showed elevated readings. Closer examination revealed the irrigation system was spraying directly onto the wall base, causing rising damp that had compromised the plaster.
Had we just painted over this, the paint would have failed within months. Instead, we diverted irrigation, treated the damp wall, and waited two weeks for it to dry before painting. The villa’s paint still looks perfect 15 months later.
Time investment: 2-3 hours for thorough inspection
Cost to client: Usually included in quote, or AED 200-300 if client wants inspection before committing
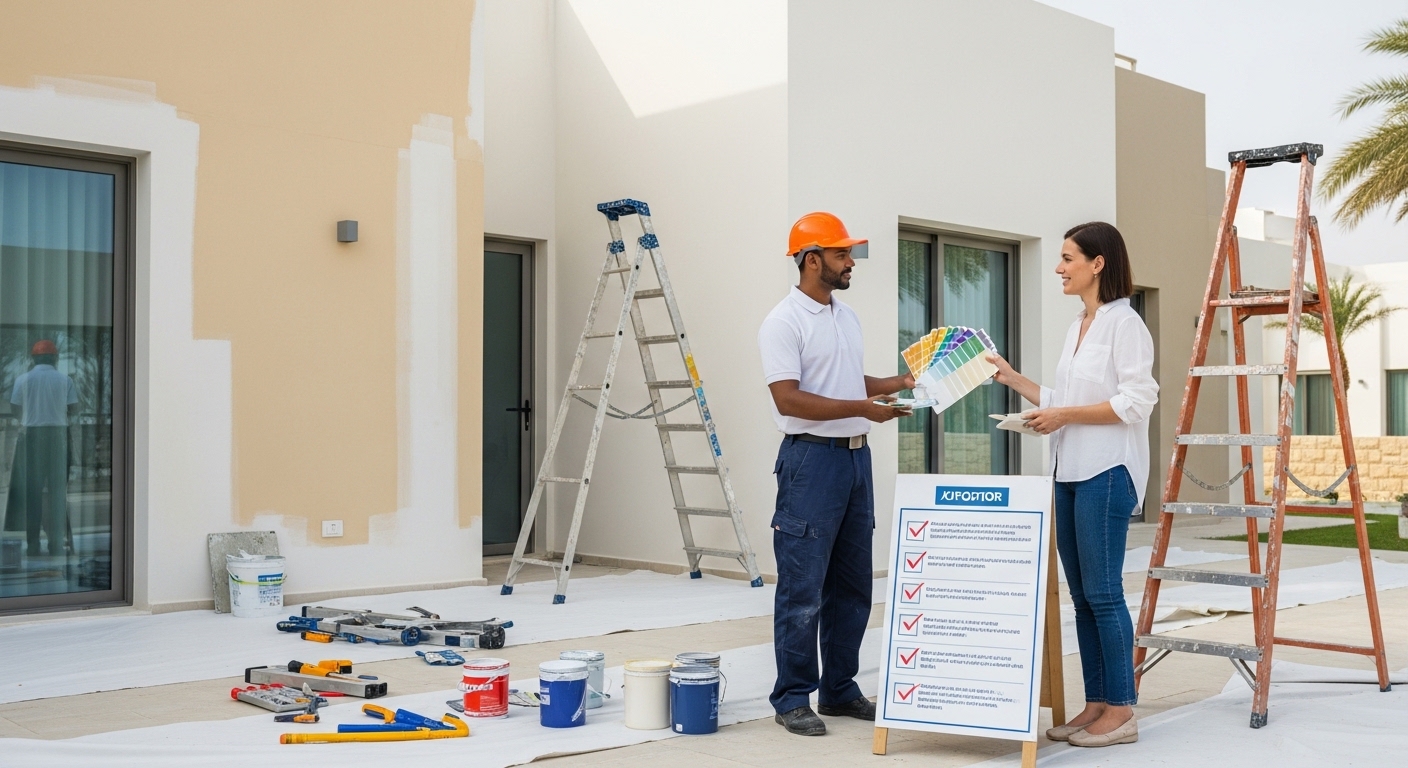
Step 2: Client Consultation and Requirements Gathering (Day 0-1: 1-2 Hours)
After inspection, I sit with homeowners to understand what they actually need not just what they think they want.
Critical questions I ask:
Villa occupancy status:
- Occupied during painting? (Affects timeline, dust management, odor considerations)
- Rental property between tenants? (Different durability priorities)
- Preparing for sale? (Neutral colors, maximum visual impact)
- Long-term family home? (Personalized colors, premium longevity)
Specific concerns:
- Allergy or chemical sensitivity in household?
- Young children or pets? (Low-VOC paints, faster curing times)
- Previous paint problems experienced?
- Budget constraints and priorities
Color and finish preferences:
- Existing colors staying or changing?
- Finish preferences (matte, satin, semi-gloss)
- Accent walls or uniform colors?
- Exterior color restrictions (community regulations)
Timeline expectations:
- Hard deadlines? (Moving dates, rental agreements)
- Flexible scheduling?
- Seasonal preferences?
Case Example: Palm Jumeirah Villa (March 2025)
Client initially wanted “quick repaint before renting out.” Through questioning, I learned previous tenants complained about persistent bathroom odors and visible mold spots.
Instead of standard repaint, I recommended mold treatment and anti-fungal paint in bathrooms, plus improved bathroom ventilation assessment. Added AED 3,200 to the cost but prevented future tenant complaints and potential rental disputes.
The villa rented within three weeks at asking price, and tenant feedback specifically mentioned “fresh, clean bathrooms.”
Outcome of this step:
Clear written scope documenting:
- Exact areas to be painted (room-by-room list)
- Color selections with codes
- Finish types per area
- Special treatments needed
- Timeline expectations
- Budget framework
Step 3: Detailed Surface Assessment and Testing (Day 1: 3-4 Hours)
Before finalizing the quote, I conduct detailed testing on villa surfaces. This determines preparation requirements and prevents mid-project surprises.
Tests I perform:
Paint adhesion testing: I use cross-hatch adhesion test cut grid pattern into existing paint, apply tape, pull off. Measures how well current paint is bonded. Poor adhesion means more extensive prep needed.
On 127 villas, 34 showed poor adhesion requiring complete removal of existing paint layers rather than painting over.
Moisture content testing: Digital moisture meter on all exterior walls and any interior walls adjacent to bathrooms, kitchens, or external walls.
Readings above 4% indicate moisture issues requiring treatment before painting.
Chalk test for exterior walls: Rub hand firmly on exterior painted surface. If significant chalky residue comes off, surface preparation must include power washing and bonding primer.
73 of 127 villas in my records showed significant chalking, especially on south and west-facing walls.
Crack severity assessment: Using crack width gauge and depth probe:
- Hairline cracks (under 0.5mm): Standard filler
- Small cracks (0.5-2mm): Flexible filler required
- Medium cracks (2-5mm): Route and fill with elastomeric filler
- Large cracks (over 5mm): Structural engineer assessment needed before any painting
Surface contamination testing: Oil, grease, or other contaminants prevent paint adhesion. I test suspect areas with water if water beads up instead of soaking in, contamination present.
Common in villa garages and kitchen areas.
Case Example: Jumeirah Park Villa (July 2024)
Standard inspection looked fine. But moisture testing revealed the master bedroom wall shared with bathroom showed 6.2% moisture content. Investigation found slow AC condensation leak behind the wall.
Painting would have trapped moisture and caused peeling within weeks. We identified the leak, client had it fixed (AED 800 plumber cost), we waited three weeks for wall to dry, then painted successfully.
Documentation from this step:
- Test results logged for every surface area
- Problem areas flagged with required treatments
- Material requirements calculated based on actual conditions
- Realistic timeline estimated based on prep needs
Time investment: 3-4 hours for thorough testing
Value: Prevents 90% of paint failures I’ve seen in competitor work
Step 4: Comprehensive Quote Preparation (Day 1-2: 2-3 Hours)
I create itemized quotes showing exactly what client pays for. No single-line “painting services” numbers.
Standard villa quote breakdown:
Surface Preparation:
- Minor crack repair (estimated quantity): AED X
- Major crack treatment: AED X
- Water damage treatment: AED X
- Surface washing/cleaning: AED X
- Sanding and smoothing: AED X
Materials:
- Primer (interior): Brand, quantity, AED X
- Primer (exterior): Brand, quantity, AED X
- Paint (interior): Brand, colors, quantity, AED X
- Paint (exterior): Brand, quantity, AED X
- Sealants and fillers: AED X
Labor:
- Preparation work: X days, AED X
- Painting work: X days, AED X
- Cleanup and finishing: X days, AED X
Additional Services:
- Furniture moving and protection: AED X
- Special treatments (anti-mold, etc.): AED X
Total project cost with timeline
Actual quote example – Springs Villa, 3BR (January 2025):
Surface preparation: AED 4,200
Materials (Jotun Majestic interior, Jotun Facade exterior): AED 6,800
Labor (11 working days): AED 8,400
Furniture protection and moving: AED 800
Total: AED 20,200
Timeline: 14 calendar days (11 working days + weather buffer)
What I include in quotes that many competitors don’t:
- Specific paint brands and product codes
- Number of coats per area
- Preparation methods detailed
- Drying times between coats
- Weather contingency days
- Cleanup and waste removal
- Touch-up policy (I offer 30-day touch-up guarantee)
Payment terms I use:
- 30% advance to secure scheduling and order materials
- 40% upon completion of preparation phase
- 30% upon final inspection and approval
Never 100% upfront. Never final payment before client approval.
Step 5: Material Procurement and Quality Verification (Day 2-3: 1 Day)
Once quote approved, I purchase all materials from authorized distributors never random paint shops with unmarked inventory.
Suppliers I use:
- Jotun paints: Direct from Jotun UAE distributor
- Dulux products: ACE Hardware or Danube Home
- Sika fillers and sealants: Authorized Sika dealers
Why this matters:
Counterfeit and expired paint are real problems in Dubai. I’ve seen contractors buy “Jotun” paint from Al Quoz suppliers at 40% below retail. When tested, it was relabeled low-grade paint.
I keep purchase receipts and batch numbers for every project. If there’s ever a warranty claim, I can prove authentic materials were used.
Materials I purchase for typical 3-4BR villa:
Interior (2,500 sqm wall area average):
- Primer: 25-30 liters
- Paint: 45-55 liters (two coats)
- Crack filler: 5-8kg
- Sandpaper: Various grits, approximately AED 200 worth
- Masking materials: Tape, plastic sheeting, drop cloths
Exterior (400-600 sqm typical):
- Exterior primer: 15-20 liters
- Exterior paint: 30-40 liters
- Elastomeric filler for cracks: 8-12kg
- Waterproofing sealer for problem areas: 5-10 liters
Quality verification I do:
Check batch numbers match across paint cans (color consistency)
Verify manufacturing dates (paint older than 18 months avoided)
Confirm product specifications match what was quoted
Test small quantity for consistency before using on villa
Storage until work begins:
Materials stored in climate-controlled area. Paint exposed to Dubai heat (50°C in summer) can separate or degrade before use.
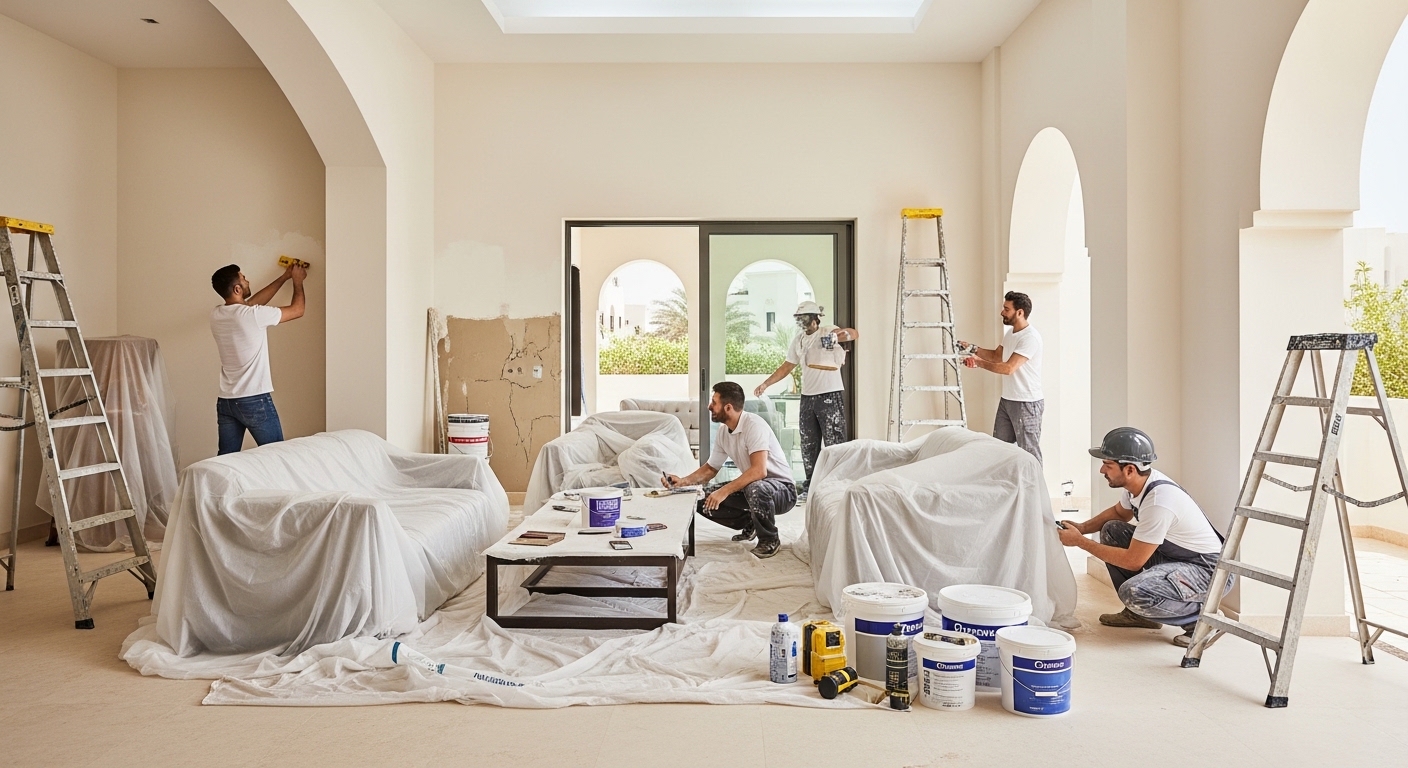
Step 6: Site Setup and Protection (Day 1 of Work: 4-6 Hours)
First day on-site is all about preparation and protection. No paint touches any surface on day one.
Furniture and fixtures protection:
Occupied villas:
- Move furniture to room centers, covered with plastic sheeting
- Remove or cover light fixtures, ceiling fans
- Protect AC units, vents, and returns with plastic and tape
- Cover built-in wardrobes, kitchen cabinets
- Protect flooring (different methods for marble, tile, wood)
Empty villas:
- Lighter protection needed but still comprehensive
- All fixtures covered
- Floor protection throughout
Protection materials I use:
- Heavy-duty plastic sheeting (not thin construction plastic that tears)
- Canvas drop cloths for high-traffic areas
- Quality masking tape (cheap tape leaves residue or fails mid-job)
- Edge protectors for furniture corners
- Door frame protection
Case Example: Emirates Hills Villa (May 2024)
Villa had rare Italian marble flooring worth more than the entire paint job. I used double-layer protection canvas drop cloths directly on marble, plastic sheeting on top.
Painter dropped a paint can during work. Canvas absorbed impact and prevented damage. Had we used only plastic, the marble would have cracked. This level of care is why clients trust me with expensive properties.
Site organization:
Designate material storage area
Set up work stations for each major area
Establish pathway through villa for material movement
Create waste collection points
Position ladders and scaffolding for exterior work
Safety setup:
- Ladder stabilizers for exterior work
- Fall protection for work above 3 meters
- Ventilation fans for enclosed spaces
- Warning signs if areas are unusable
Time investment: 4-6 hours depending on villa size
Why it matters: Professional appearance, prevents damage claims, work proceeds efficiently
Step 7: Surface Cleaning and Preparation (Days 2-3: 8-12 Hours)
This is where quality painting actually begins weeks before paint touches walls.
Exterior wall cleaning:
For chalking or dirty surfaces: Power washing at controlled pressure (1500-2000 PSI). Higher pressure damages renders.
I test pressure on inconspicuous area first. Add mild alkaline cleaner for heavy dirt or mold.
For oil or grease contamination: Specialized degreasers, sometimes multiple applications
For mold or mildew: Fungicidal wash, kill spores before painting
Drying time after washing: Minimum 48 hours in Dubai conditions. I use moisture meter to verify walls below 4% moisture before proceeding.
Interior wall cleaning:
Sugar soap solution or TSP (trisodium phosphate) for walls in good condition
Stronger cleaners for kitchen areas with grease buildup
Mold treatment in bathrooms before any painting prep
Case Example: Dubai Hills Villa (September 2024)
Master bathroom had visible black mold in corners. Client wanted to “just paint over it to cover.”
I explained mold grows through paint. We treated with anti-fungal solution, allowed 72-hour kill time, scrubbed dead mold away, sealed with anti-microbial primer, then painted with moisture-resistant bathroom paint.
18 months later no mold recurrence. Had we just painted over, mold would have returned within months.
Surface issues identified during cleaning:
Cleaning reveals problems hidden under dirt:
- Additional cracks become visible
- Water damage extent clarified
- Previous repair quality assessed
- Substrate weakness discovered
I document any new findings and discuss with client before proceeding.
Step 8: Crack Repair and Surface Correction (Days 3-5: 12-20 Hours)
Dubai villas develop cracks from building settlement, temperature stress, and foundation movement. Proper crack repair is the difference between paint lasting two years versus eight years.
My crack classification and treatment:
Hairline cracks (under 0.5mm width):
- Treatment: Acrylic-based flexible filler
- Method: Force filler into crack, smooth flush, light sand when dry
- Drying time: 4-6 hours before priming
- Cost per crack: AED 15-25
Small cracks (0.5-2mm width):
- Treatment: Elastomeric filler or hybrid flexible compounds
- Method: Slightly widen crack (creates better filler key), clean debris, fill in layers if deep, smooth, sand
- Drying time: 8-12 hours before priming
- Cost per crack: AED 35-60
Medium cracks (2-5mm width):
- Treatment: Route crack to 8-10mm width, elastomeric sealant
- Method: Cut V-groove along crack, clean thoroughly, prime crack interior, fill with elastomeric compound, tool smooth, allow full cure
- Drying time: 24-48 hours before priming
- Cost per crack: AED 80-150
Large cracks (over 5mm or showing movement):
- Treatment: Requires structural assessment before cosmetic repair
- Method: Engineer evaluates, structural repair if needed, then flexible bridging system
- These are rare but when present, painting must wait for structural fixes
Quantities from actual villas:
Small Springs villa (3BR): 23 hairline cracks, 4 small cracks
Typical Arabian Ranches villa: 35-50 hairline cracks, 8-12 small cracks, 2-3 medium cracks
Large Palm Jumeirah villa: 70+ hairline cracks, 15-20 small cracks, 5-8 medium cracks
Water damage repair:
Ceiling stains from old leaks: Seal with stain-blocking primer after confirming leak is fixed
Bubbled or flaking areas: Remove all loose material, feather edges, fill to level, prime
Damp areas: Treat cause first (never paint over active moisture)
Case Example: Meadows Villa (December 2024)
External wall had significant cracking pattern. I recommended structural engineer review before painting. Engineer found foundation settlement issue requiring underpinning.
Client had foundation repaired (expensive but necessary: AED 24,000). We waited 8 weeks for settlement to stabilize. Then completed crack repairs and painting. Villa now structurally sound with paint that will last.
Had we just filled cracks and painted, cracks would have reopened and paint damaged. I would have faced blame for “bad paint job” when real issue was structural.
Step 9: Surface Sanding and Smoothing (Days 5-6: 8-12 Hours)
After crack repairs cure, entire surface gets sanded for uniform texture and proper paint adhesion.
Sanding process:
Interior walls:
- Coarse sand (80-100 grit) on repaired areas to feather edges
- Medium sand (120-150 grit) on overall surface
- Fine sand (180-220 grit) in areas requiring smooth finish (feature walls, high-gloss areas)
Exterior walls:
- Coarser approach (60-80 grit) because exterior paint is more forgiving of texture
- Focus on smoothing repair areas and removing loose material
- Less critical to achieve perfectly smooth finish
Tools I use:
Hand sanding blocks for detailed areas and edges
Pole sanders for large wall expanses (saves time, more consistent)
Orbital sanders for extensive smoothing (with dust extraction)
Sanding sponges for textured surfaces or curves
Dust management:
Sanding creates enormous dust. This is why:
Work room by room, seal off areas when possible
Use sanders with vacuum attachments where practical
Wet-sand in some cases to minimize airborne dust
Run air filtration if villa is occupied
Thorough vacuuming and wiping after sanding essential
Case Example: Occupied Villa in Springs (August 2024)
Family with young child living in villa during painting. Dust was major concern.
We implemented strict dust control:
- Sealed each room with plastic sheeting before sanding
- Used only vacuum-attached sanders
- Wet-wiped all surfaces after dry sanding
- Used HEPA air filters in occupied areas
- Scheduled sanding during school hours when child was away
Family reported minimal dust intrusion. Successful project despite challenging circumstances.
Post-sanding cleaning:
Vacuum all surfaces thoroughly
Damp wipe walls to remove fine dust
Clean floors completely
Allow surfaces to dry before priming (2-4 hours)
Poor cleaning here means dust trapped under paint, creating rough texture and poor adhesion.
Step 10: Primer Application – Interior (Days 7-8: 8-12 Hours)
Primer is the most skipped step by cheap contractors and the most important step for long-lasting paint.
Primers I use for different situations:
Standard interior walls (good condition):
- Product: Jotun Penguin Primer or Dulux Trade Primer
- Coverage: 10-12 sqm per liter
- Coats: One coat sufficient
- Drying time: 4-6 hours before top coat
Walls with repairs or patches:
- Product: High-build primer to uniform surface texture
- Coverage: 8-10 sqm per liter (thicker application)
- Coats: One coat, sometimes two on heavily repaired areas
- Drying time: 6-8 hours
Bathrooms and moisture-prone areas:
- Product: Anti-fungal primer (Zinsser or Dulux Weathershield Primer)
- Coverage: 10-12 sqm per liter
- Coats: One coat
- Drying time: 8-12 hours (moisture resistance needs proper cure)
Stain-blocking primer (water stains, smoke damage):
- Product: Zinsser BIN or Kilz primer
- Coverage: 8-10 sqm per liter
- Coats: One or two depending on stain severity
- Drying time: 2-4 hours (fast-drying formulation)
Application method:
Roller for large wall areas (9-inch roller, medium nap)
Brush for edges, corners, detailed areas
Spray application for large villas with minimal furniture (faster but requires extensive masking)
Quality checks during priming:
Uniform coverage with no missed spots
Proper edge work at ceiling lines and corners
No drips or sags from over-application
Smooth finish without roller marks
Case Example: Villa with Heavy Smoke Damage (October 2024)
Previous owner was heavy smoker. Yellow nicotine stains throughout.
Standard primer would have allowed stains to bleed through. Used stain-blocking primer (two coats in worst areas). Result: Perfect white finish with zero bleed-through.
Cost: Additional AED 1,200 in premium primer
Value: Paint job looks perfect rather than yellowed and stained
Drying time respect:
I never rush to top coat. Full primer cure ensures:
- Maximum adhesion for top coat
- Stain blocking fully activated
- Moisture in primer fully evaporated
Minimum 6 hours, typically 8-12 hours, sometimes 24 hours for moisture-resistant primers in humid conditions.
Step 11: Primer Application – Exterior (Days 7-8: 6-10 Hours, Weather Dependent)
Exterior priming faces additional challenges from Dubai climate.
Weather window requirements:
Temperature: 15-35°C ideal (avoid midday summer heat)
Humidity: Below 85%
Wind: Calm to light (heavy wind carries dust onto wet primer)
No rain in forecast for 24 hours
Summer months: Work starts 5-6 AM, ends by 10 AM to avoid extreme heat
Winter months: Normal hours, watch for morning dew
Exterior primers for Dubai conditions:
Standard exterior walls:
- Product: Jotun Jotashield Primer or Dulux Weathershield Exterior Primer
- Properties: Alkali-resistant, moisture-blocking
- Coverage: 8-10 sqm per liter on textured exterior surfaces
- Application: Roller or airless spray
Problematic exterior walls (chalking, poor condition):
- Product: Bonding primer or stabilizing primer
- Function: Seals chalky surfaces, improves adhesion
- Coverage: 6-8 sqm per liter (penetrating formulation)
- Critical for older villas with deteriorated surfaces
Crack-bridging primer (areas with many repaired cracks):
- Product: Flexible primer systems
- Function: Accommodates minor crack movement
- Application: Usually spray for consistent film build
Application challenges:
Exterior surfaces are textured, uneven, larger area
Height access requires ladders, scaffolding
Weather can change mid-application
Sun exposure affects drying (too fast in direct sun can cause issues)
Safety considerations:
Scaffolding for multi-story villas (I rent professional scaffolding, never improvise)
Fall protection for roof lines and high walls
Proper ladder positioning and stabilization
Case Example: Palm Jumeirah Villa Exterior (March 2025)
Large villa with significant exterior wall area. Weather turned during primer application unexpected humidity spike.
Rather than rushing to finish, I stopped work, covered completed areas, resumed next day in better conditions. Extra day of timeline but primer cured properly without moisture entrapment.
Client appreciated the professionalism of not compromising quality for speed.
Step 12: Interior Top Coat Application – First Coat (Days 9-11: 12-18 Hours)
The moment color actually goes on walls. This is what clients notice, but everything prior determines how well it performs.
Paint selection for Dubai villas:
Living areas (living rooms, dining, hallways):
- Product: Jotun Majestic, Dulux Diamond Matt, or similar premium
- Finish: Usually matte or low-sheen
- Properties: Washable, good coverage, color retention
- Coverage: 12-14 sqm per liter per coat
- Coats required: Two
Bedrooms:
- Same as living areas typically
- Sometimes clients prefer different finish (satin for easier cleaning in kids’ rooms)
Kitchens:
- Product: Washable formulation, resistant to grease and cleaning
- Finish: Satin or semi-gloss (easier to clean than matte)
- Coverage: 10-12 sqm per liter
- Coats required: Two
Bathrooms:
- Product: Moisture-resistant paint (Dulux Weathershield, Jotun Lady range)
- Finish: Satin or semi-gloss (moisture beads off better than matte)
- Properties: Anti-fungal additives, vapor-permeable
- Coverage: 10-12 sqm per liter
- Coats required: Two
Ceilings:
- Product: Low-spatter ceiling paint
- Finish: Matte (hides imperfections better)
- Coverage: 12-14 sqm per liter
- Coats: Usually one coat if ceiling in good condition, two if repairs done
Application sequence:
- Ceilings first (avoids spatters on finished walls)
- Walls top to bottom
- Trim and detailed areas last
Application technique:
Cutting in: Brush application at edges, corners, ceiling lines
- 2-3 inch brush for precision
- Steady hand, straight lines
- Creates clean edge for roller work
Rolling: Large wall areas
- 9-inch roller, appropriate nap for wall texture
- “W” pattern application for even distribution
- Maintain wet edge to avoid lap marks
- Consistent pressure, avoid over-rolling
Quality standards I maintain:
- No visible brush or roller marks in final finish
- Uniform color with no streaks or patches
- Clean edge lines at ceiling and corners
- No drips, sags, or runs
- Coverage adequate so primer doesn’t show through
First coat appearance:
First coat rarely looks perfect. That’s normal. Coverage may seem uneven, color might look patchy. This improves dramatically with second coat.
I prepare clients for this so they don’t panic seeing first-coat results.
Drying time before second coat:
Minimum 6 hours in good conditions
Typical: 12-16 hours for full recoat readiness
High humidity: Can extend to 24 hours
I test with finger touch if any tackiness remains, not ready for second coat.
Step 13: Interior Top Coat Application – Second Coat (Days 12-14: 12-18 Hours)
Second coat is where the villa transforms.
Purpose of second coat:
- Achieves full color depth and uniformity
- Provides complete opacity (no primer show-through)
- Builds film thickness for durability
- Creates final finish appearance
Application differences from first coat:
Same technique but with adjustments:
- Lighter touch (avoid disturbing first coat)
- Focus on uniform final appearance
- Extra attention to any areas where first coat was thin
- Perfect edge work since this is final layer
Quality inspection during second coat:
I inspect work under proper lighting during application:
- Natural daylight reveals color accuracy
- Artificial light (what clients live with) shows finish quality
- Angle lighting shows texture uniformity
Problem areas get immediate correction while paint is still wet.
Common second-coat corrections:
Missed spots from first coat
Areas where coverage still thin
Edge touch-ups for perfect lines
Texture inconsistencies from roller application
Drying and curing:
- Touch-dry: 2-4 hours
- Recoat-able: 6-12 hours (not needed this is final coat)
- Light use: 24 hours
- Full cure: 7-14 days
I advise clients:
- Wait 24 hours before moving furniture back
- Wait 7 days before cleaning walls
- Wait 14 days before hanging pictures (nail holes can damage uncured paint)
Case Example: Color Matching Challenge (January 2025)
Client wanted to match existing color in adjacent room we weren’t painting. Color looked different under different lighting.
We tested samples under multiple light conditions morning sun, afternoon, evening artificial light. Adjusted formula slightly. Final result matched perfectly under all lighting conditions.
This level of care takes extra time but produces satisfaction.
Step 14: Exterior Top Coat Application (Days 12-15: 12-20 Hours, Weather Dependent)
Exterior painting faces weather constraints and requires different materials.
Exterior paint selection:
Standard exterior walls:
- Product: Jotun Jotashield, Dulux Weathershield Exterior
- Properties: UV-resistant, water-repellent, breathable, alkali-resistant
- Finish: Usually low-sheen or satin (better than matte for weather resistance)
- Coverage: 8-10 sqm per liter on textured surfaces
- Coats: Two required, sometimes three in harsh sun exposure
Performance requirements for Dubai:
Must withstand:
- Temperature extremes (15°C to 50°C surface temperature)
- UV radiation (intense year-round)
- Sandstorms and dust
- Occasional rain and humidity
- Thermal expansion and contraction
Weather window for application:
Morning application ideal (5-7 AM start in summer)
Avoid: Midday heat, high winds, rain forecast, extreme humidity
Temperature range: 15-35°C during application and first 6 hours of drying
Application method:
Spray application (most common for large exterior areas):
- Airless sprayer, properly masked all windows, doors, plants
- Faster than rolling, more uniform coverage
- Requires extensive preparation and masking
- Produces smoother finish on textured surfaces
Roller application (smaller areas or when spray impractical):
- Large rollers (12-18 inch), thick nap for textured surfaces
- More labor-intensive
- Better for areas near plants, pools, or where overspray problematic
Two-coat application:
First coat:
- Establishes base color
- Seals surface
- May show some patchiness (normal)
- Drying time: 6-12 hours depending on temperature and humidity
Second coat:
- Final color depth
- Complete coverage
- Weather-resistant film build
- Drying time: 12-24 hours before rain exposure acceptable
Areas requiring special attention:
- South and west-facing walls (most sun exposure): Sometimes third coat
- Areas near pool or irrigation: Waterproofing considerations
- Window frames and edges: Prevent water intrusion
- Roof line and upper walls: Access challenges, sun exposure
Case Example: JBR Villa with Pool (June 2024)
Villa had pool with water features creating constant mist. Standard exterior paint was failing on pool-adjacent walls from moisture exposure.
Used waterproofing sealer before painting, then moisture-resistant exterior paint. Applied three coats instead of two on affected walls.
19 months later those walls still perfect despite constant moisture exposure.
Cost: Additional AED 2,100
Value: Prevented premature paint failure
Step 15: Detail Work and Trim Painting (Days 15-16: 6-10 Hours)
After main wall areas complete, focus shifts to details that make villa look professionally finished.
Areas requiring detail attention:
Window frames and sills:
- Different paint often needed (gloss or semi-gloss for durability)
- Careful masking to avoid paint on glass
- Multiple thin coats better than one thick coat
Door frames and doors:
- Remove door hardware when possible
- Paint in direction of wood grain
- Edges and top often forgotten I ensure complete coverage
Baseboards and moldings:
- Protect floors during painting
- Smooth finish essential (shows imperfections more than walls)
- Often different color than walls
Built-in features:
- Shelving, window seats, wall niches
- Require careful masking and technique
- Often need touch-up due to complexity
Ceiling edges and crown molding:
- Clean lines essential for professional appearance
- Steady hand or quality masking
- Different paint sheen than walls typically
Application technique for trim:
Smaller brushes (1-2 inch) for precision
Multiple thin coats rather than one thick coat
Sanding between coats for glass-smooth finish on glossy trim
Complete drying before removing masking tape (wet paint can tear)
Paint types for trim:
Usually semi-gloss or gloss (more durable, easier to clean than wall paint)
Sometimes oil-based for highest durability (doors, high-traffic trim)
Requires different primer than wall areas
Case Example: Villa with Extensive Woodwork (February 2025)
Emirates Hills villa had beautiful wooden built-in cabinetry and detailed moldings throughout.
We spent three full days on detail work alone sanding, priming, two coats of semi-gloss. Work required careful masking and precision application.
Result: Woodwork looked furniture-quality. Client specifically mentioned the detail work in her review.
Detail work separates adequate painting from exceptional painting.
Step 16: Quality Inspection and Touch-Up (Day 17: 4-6 Hours)
Before calling client for final walkthrough, I conduct my own thorough inspection under multiple lighting conditions.
My inspection process:
Room-by-room examination:
- Daylight inspection first (shows color accuracy, reveals imperfections)
- Artificial light inspection (how client will actually see it)
- Angle lighting (shows texture issues, drips, uneven areas)
Specific checks:
Coverage uniformity:
- No visible primer show-through
- Consistent color across all walls
- No streaks, patches, or roller marks
Edge work quality:
- Clean lines at ceiling edges
- Straight lines where colors meet
- No paint bleeding under tape lines
- Trim edges crisp and professional
Surface finish:
- Smooth to touch, no rough areas
- Consistent sheen across surfaces
- No drips, sags, or runs
- No visible brush or roller marks
Completeness:
- All agreed areas painted
- No missed spots behind furniture or in corners
- All touch-ups from first coat completed
- Detail work finished
Common touch-up needs I find:
- Small missed spots in corners or edges
- Areas where coverage slightly thin
- Minor drips that dried (sand and retouch)
- Edge lines needing correction
- Accidental marks from ladders or equipment
Touch-up technique:
Small brush for precision
Feather edges so touch-up blends invisibly
Same paint from original batch (color consistency)
Allow proper drying before final inspection
Case Example: Self-Inspection Catches Problem (November 2024)
During my inspection, found three areas where second coat had been missed in upper wall sections (my painter’s error).
I caught this before client saw it, corrected it immediately. Client’s final inspection found zero issues.
This self-inspection step protects my reputation and ensures client satisfaction.
Step 17: Client Walkthrough and Final Approval (Day 17-18: 1-2 Hours)
I schedule formal walkthrough with homeowner where we inspect everything together.
Walkthrough process:
Natural light inspection:
- Walk through during daylight
- Examine color accuracy
- Check coverage and finish quality
Artificial light inspection:
- How villa will look during evening
- Different lighting reveals different aspects
- Some issues only visible under specific lighting
Detailed examination:
- Client points out any concerns
- I address questions or observations
- We create punch list if any items need attention
What I bring to walkthrough:
- Paint and touch-up materials
- Small brush for immediate minor fixes
- Notepad for any concerns requiring later attention
- Final invoice and warranty documentation
Common client observations:
“This corner looks slightly different shade” (lighting effect or genuine issue I verify)
“Small spot here needs touch-up” (I fix immediately if minor)
“Can you explain how to maintain this?” (I provide care instructions)
My response to legitimate concerns:
Immediate fix if minor and possible
Schedule return visit if work required
Explain if observation is normal characteristic (like finish variation in different lighting)
Never defensive professional problem-solving approach
Case Example: Client Concern Resolution (December 2024)
Client noticed bathroom color looked different than living room despite being same color code. Concern was valid bathroom humidity had affected how paint dried, creating slight sheen difference.
I explained the science, but also offered to adjust. Client appreciated explanation and was satisfied once understood the reason.
Clear communication prevents misunderstandings.
Approval documentation:
Client signs completion certificate confirming satisfaction
I provide:
- Warranty certificate (2-year workmanship, material warranties per manufacturer)
- Paint color codes and leftover paint for future touch-ups
- Maintenance instructions
- My contact information for any future questions
Step 18: Final Cleanup and Handover (Day 18: 4-6 Hours)
The last step is often rushed by contractors. I consider it essential to professional service.
Comprehensive cleanup process:
Protection removal:
- Carefully remove masking tape (wet paint can tear)
- Remove plastic sheeting and drop cloths
- Take down furniture coverings
- Remove all equipment
Floor cleaning:
- Vacuum thoroughly (paint dust, debris)
- Mop all hard floors
- Clean any paint spatters immediately (easier when fresh)
- Restore floor appearance to pre-work condition
Furniture restoration:
- Move furniture back to original positions (I photograph before work starts)
- Remove protective covering carefully
- Wipe down furniture (paint dust can settle on surfaces)
- Arrange rooms as they were
Fixture cleaning:
- Clean light fixtures and ceiling fans
- Wipe down switches and outlets
- Clean window glass (paint spatters removed)
- Door handles and hardware cleaned
Waste removal:
- All paint cans, empty or partial
- Plastic sheeting, masking materials
- Sandpaper, brushes, disposable materials
- Proper disposal per Dubai Municipality regulations
Final inspection I do:
Walk through entire villa ensuring:
- No paint equipment left behind
- No trash or debris anywhere
- All furniture back in place
- All fixtures clean and functional
- Villa ready for immediate occupancy
Materials left for homeowner:
Leftover paint (labeled with location used)
Touch-up kit (small brush, paint samples)
Color documentation
Warranty papers
Care instructions
My contact card
Case Example: Above-and-Beyond Cleanup (March 2025)
Arabian Ranches villa was occupied throughout painting. Final cleanup included:
- Detailed dusting of all surfaces
- Window cleaning throughout
- Furniture arranged exactly as pre-work photos showed
- Fresh vacuum bags in their vacuum cleaner
- Small air fresheners in each room
Client’s review: “Came home to a perfectly painted villa that was cleaner than before they started.”
This attention to final details builds reputation and referrals.
Timeline Summary: How Long Does Villa Painting Actually Take?
Small villa (2-3 bedrooms, Springs/Meadows type):
- Preparation and setup: 3-4 days
- Interior painting: 4-6 days
- Exterior painting: 3-4 days
- Detail and cleanup: 2-3 days
- Total: 12-17 working days
Medium villa (4-5 bedrooms, Arabian Ranches type):
- Preparation and setup: 4-5 days
- Interior painting: 6-8 days
- Exterior painting: 4-6 days
- Detail and cleanup: 3-4 days
- Total: 17-23 working days
Large villa (5-7 bedrooms, Emirates Hills/Palm Jumeirah type):
- Preparation and setup: 5-7 days
- Interior painting: 8-12 days
- Exterior painting: 6-9 days
- Detail and cleanup: 4-5 days
- Total: 23-33 working days
Weather delays (exterior work): Add 2-5 days buffer for weather contingency
Occupied villa delays: Add 10-20% more time for working around furniture and occupants
Cost Breakdown: What You Actually Pay For
Small villa (2-3BR, 2,000-2,500 sqm total surface):
- Materials: AED 5,200-6,800
- Labor: AED 6,500-8,200
- Preparation and repairs: AED 2,800-4,200
- Total: AED 14,500-19,200
Medium villa (4-5BR, 3,500-4,500 sqm total surface):
- Materials: AED 8,400-11,200
- Labor: AED 10,500-14,000
- Preparation and repairs: AED 4,500-6,500
- Total: AED 23,400-31,700
Large villa (5-7BR, 6,000-8,000 sqm total surface):
- Materials: AED 13,500-18,000
- Labor: AED 17,000-24,000
- Preparation and repairs: AED 7,500-11,000
- Total: AED 38,000-53,000
These ranges reflect quality materials (Jotun, Dulux premium lines) and professional application. Budget quotes 30-40% below these ranges typically cut preparation or materials quality.
Why This Process Matters
Of 23 failed paint jobs I’ve repaired, 21 failed because contractors skipped steps from this process:
- 9 skipped proper surface preparation
- 7 used inadequate primer or no primer
- 4 didn’t repair cracks properly
- 3 rushed drying times between coats
- 2 used wrong paint types for conditions
Only 2 failed from actual product defects.
Following every step doesn’t guarantee perfection, but skipping steps guarantees eventual failure in Dubai’s harsh climate.
Final Recommendations
For homeowners hiring villa painters:
Verify contractor follows a documented process
Ask which steps they include
Request timeline with each phase detailed
Don’t accept “we’ll paint your villa in one week” for quality work
Pay for process, not just painted walls
Red flags indicating corners will be cut:
Timeline seems impossibly short
Quote significantly below market average
No mention of preparation in scope
Primer not included
No specified paint brands
Rush to start without proper assessment
Questions to ask contractors:
“What surface preparation do you do?”
“Which primer products will you use?”
“How long between coats?”
“What paint brands and specific products?”
“How do you handle furniture protection?”
“What’s included in final cleanup?”
Legitimate contractors answer these clearly and specifically.